If you elected to have your node shipped without pre-configuration, once you have it on the WiFi and communicating with your ClearNode mobile app, your next task is to configure it with your AllStar and EchoLink credentials and settings. Here’s what the Your Nodes screen will look like.
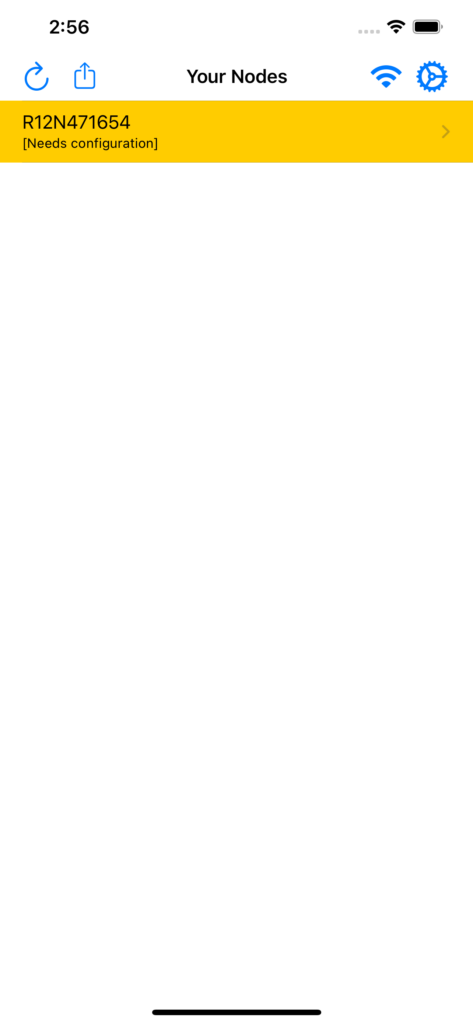
The yellow highlight indicates that the node is transmitting it’s IP Address over the integrated radio. Drill into the Node Detail screen by tapping on that first row in the table.
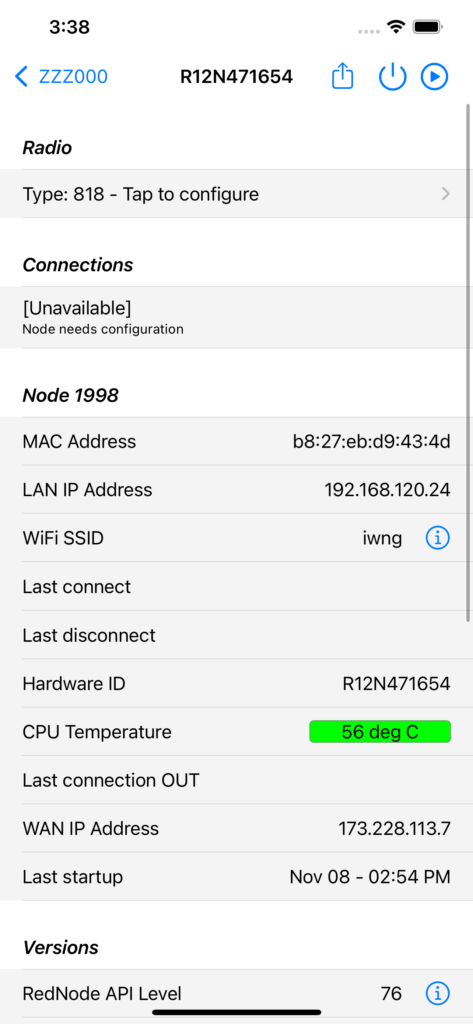
Scroll to the bottom of this screen and tap on “AllStar Setup”.
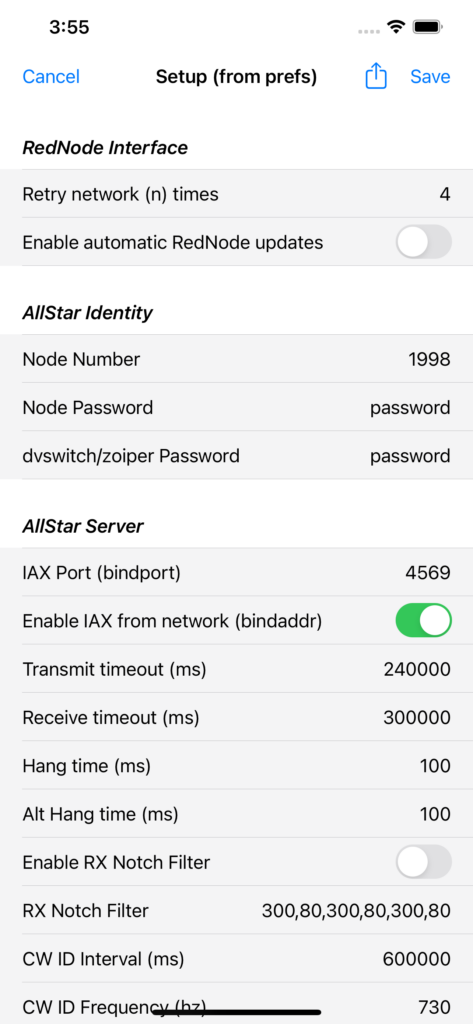
Note: for a very basic AllStar only setup – just fill out the first 2 fields in the “AllStar Identity” section – “Node Number” and “Node Password” – leave everything else at the defaults.
When you’re ready tap the Save button in the top right corner of the screen, your setup will be sent to your ClearNode and it will reboot. The setup will NOT be saved and activated until you tap the Save button.
You can use this screen multiple times to adjust your setup. (The previous settings are copied to a backup file of the same name with the current date-time appended to the file name – you can access these files by logging in directly into the Raspberry Pi with SSH using the username “root” and the password is your ClearNode Key.)
Note: The setup process recreates your ClearNode Device setup files by merging these settings into a set of templates. This is important to understand because if you make custom changes to the target configuration files directly via an SSH login to the Raspberry Pi – whatever changes you make outside of the ClearNode mobile app will be overwritten and lost, if you subsequently resend the setup from the ClearNode mobile app. (Those custom changes will be preserved in the backup file.)