(See notes on “RepeaterPhone” at the bottom)
We’ve had many requests from users to support the mobile IAXRPT clients. Whilst this was always doable by editing the “conf” files – those edits often got stamped on by the ClearNode configuration process. So we’ve setup our iax.conf and extensions.conf templates with default stanzas for these 2 popular 3rd Party mobile apps.
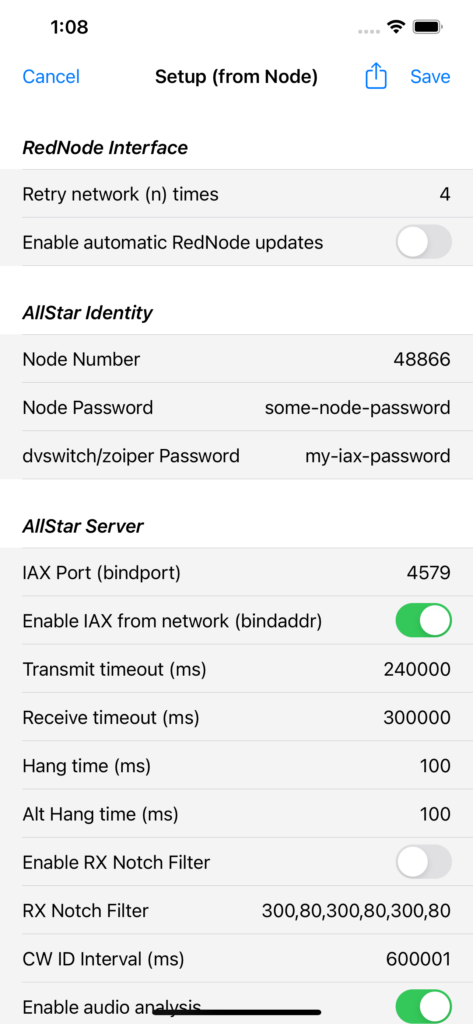
Configuration in the ClearNode mobile is very simple – navigate to the “AllStar Setup” screen from the “Node Details” screen. In the “AllStar Identity” section enter your preferred password in the “dvswitch/zoiper Password” field. Tap “Save” in the top right corner – send the configuration and wait for the node to reboot
Configuring the Zoiper Mobile Application
Bear with us here – the default configurations from DVSWitch and Zoiper suggest using your call sign as the username. Since the username is the Stanza name in iax.conf for both, and since the default stanza layout differs slightly for each of the mobile applications, and since we want to support both – we have to depart from that convention. For the Zoiper app you must use the username “zoiper” and, for the DVSwitch app, you must use the username “dvswitch”. You can put your call sign in the “Caller ID” field.

Where it says “Password” above you use the same password that you configured in the ClearNode mobile app – Node Details > AllStar Setup > AllStar Identity > “dvswitch/zoiper Password”.
Don’t forget your IAX Port (bindport) on the end of the “Server:” IP address – e.g. “192.168.1.10:4569”.
Once you get all the parameters in you should be able to tap the green “Register” button and it should start a connection to your ClearNode – you’re looking for “Registration Status: OK” as above.
If you don’t get the OK there are a number possible reasons – check the password above against the value you set in the ClearNode mobile app; is Zoiper able to connect to the name or IP address you entered above in “Server” ? Note that you won’t see any indication from your ClearNode that Zoiper is registered.
Now that your Zoiper app is registered with your ClearNode, the next step is to actually start a bi-directional audio connection to your node. In the Zoiper app back out of the “Accounts” section to the “Settings” screen, then select the “Dialpad” option in the bottom strap. Your screen will looks something like the following.
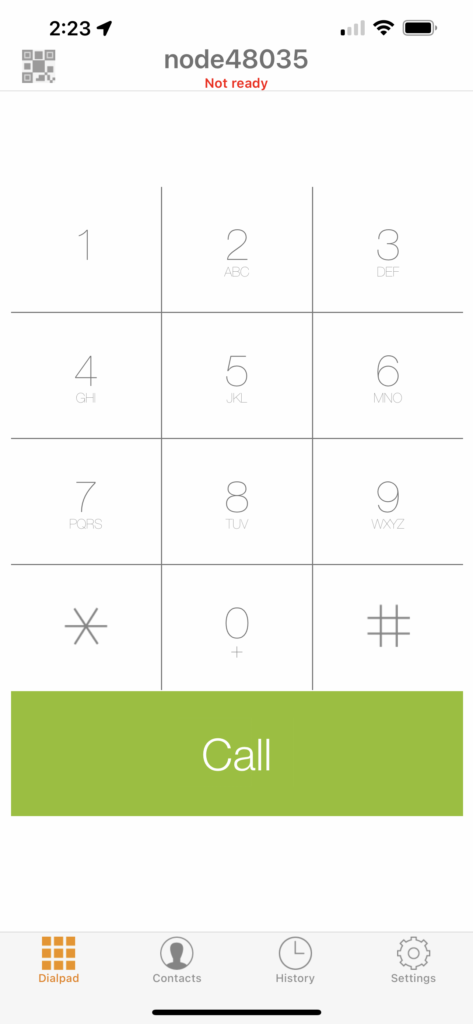
Note above that your node is “Not ready” – that’s because this isn’t the node account you selected in the previous step. Tap on node name above “Not ready”.
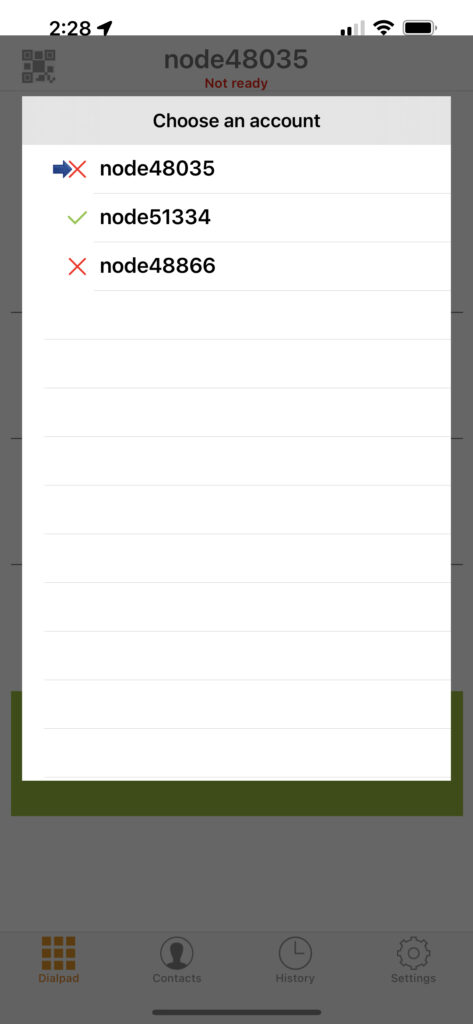
Select the account you registered in the earlier steps – now Zoiper is ready to connect.
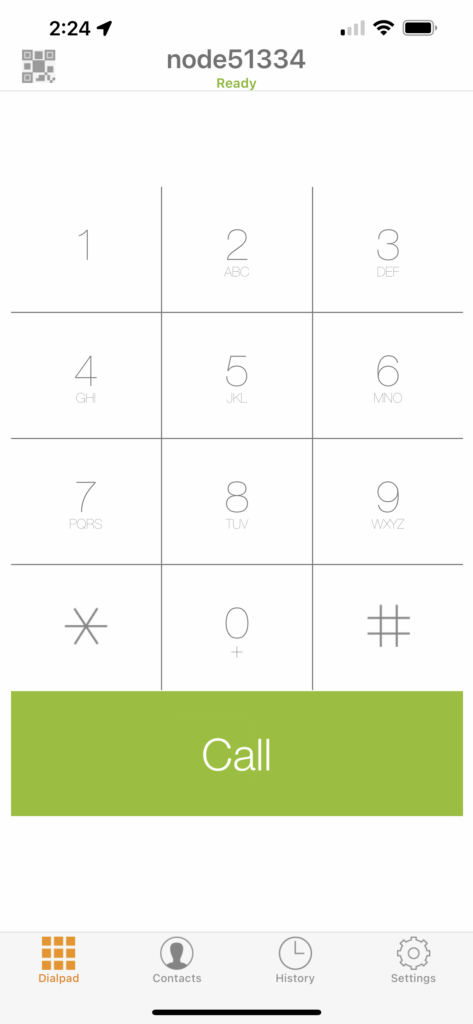
This is where things get a little anti-intuitive – despite being registered with the correct account you are still not connected to your AllStar node – you have to dial it in “51334” above and then “Call” it with the big green button.
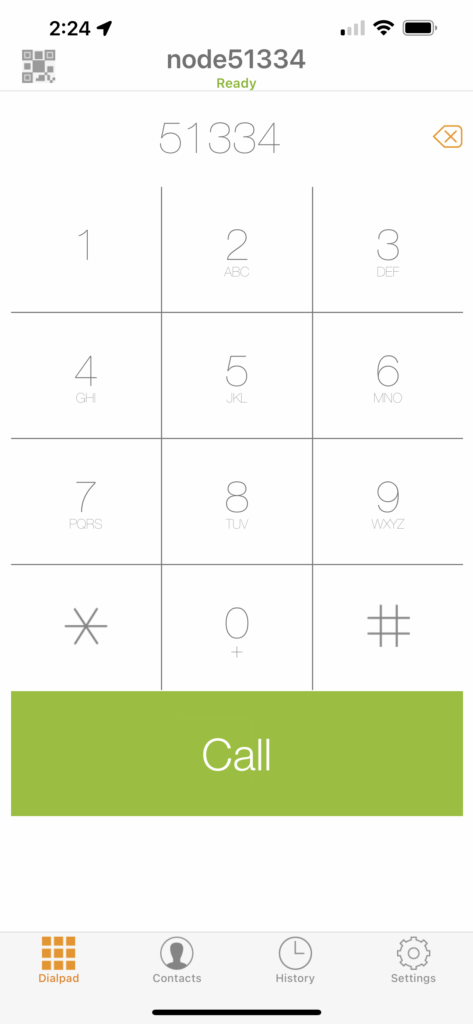
After dialing the node number and tapping the green “Call” button, wait a few seconds for the screen to switch so it looks like the following.
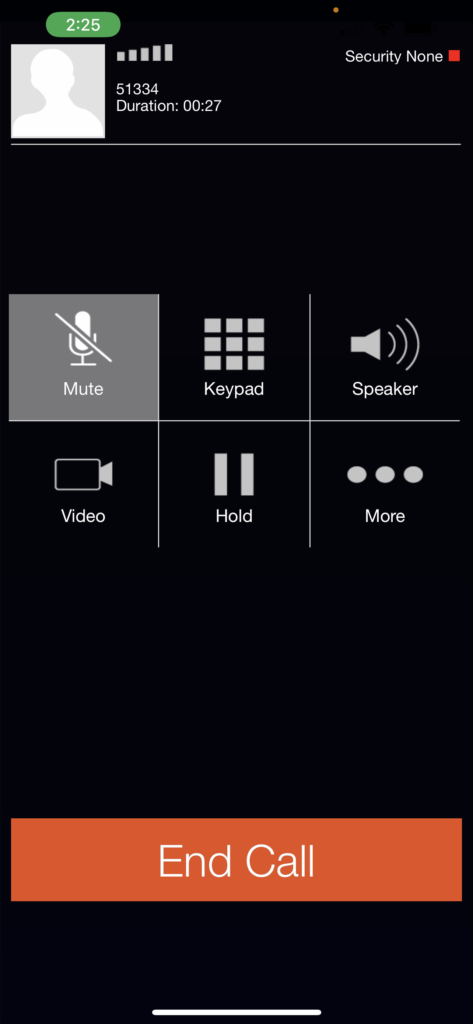
WARNING: When this screen first appears – the “Mute” icon will NOT be selected – that probably means you are sending audio to your node – and sending audio to any other node your node is connected to. Immediately tap “Mute” until you’re ready to send audio. We suggest completing your Zoiper to ClearNode connection BEFORE you connect your ClearNode to another system to prevent accidentally locking up that remote system.
Zoiper works using VOX rather than a PTT button – so to be sure you are not inadvertently sending audio to a remote connection – keep the “Mute” button turned on except when you want to speak.
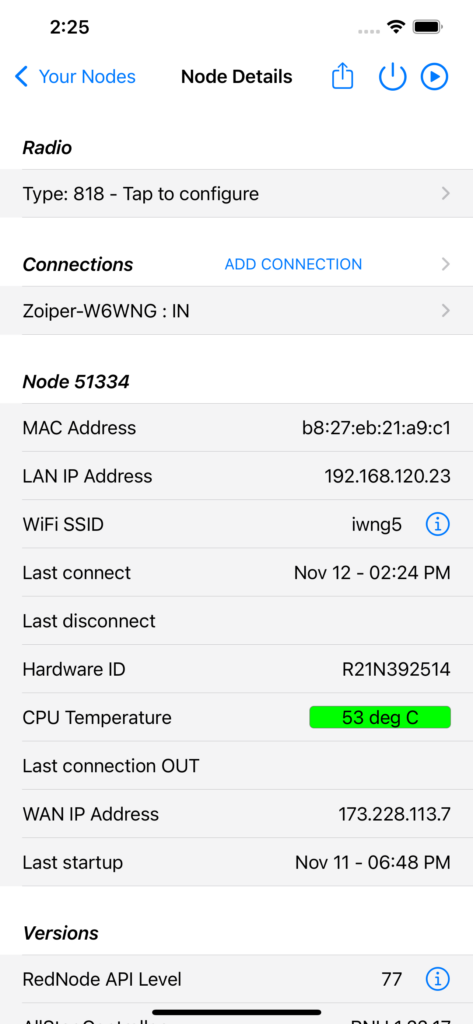
Here’s what your ClearNode mobile app “Node Details” screen will look like – confirming that Zoiper is connected inbound to your ClearNode.
Configuring the DVSwitch Mobile Application
Navigate to the “Accounts” sreen via the tab at the top the “Dialpad” screen.
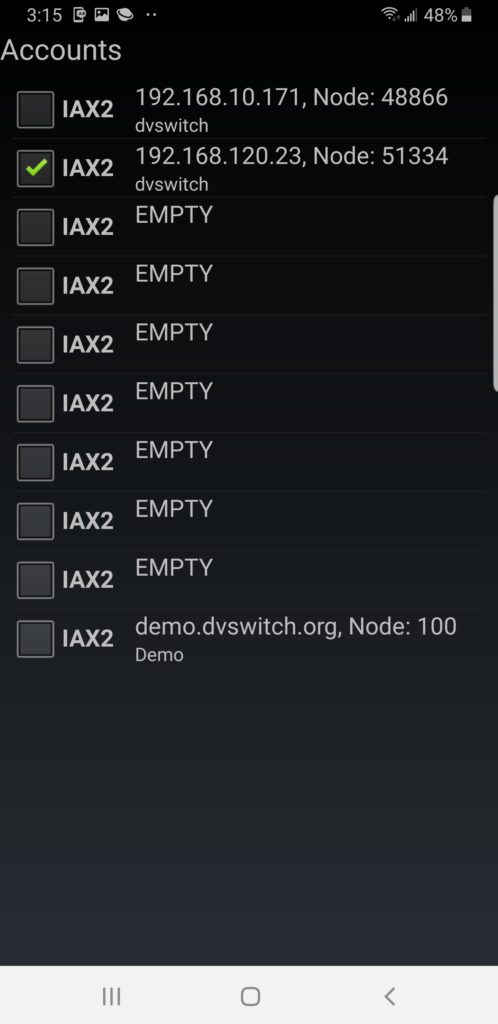
Pick an EMPTY entry to prepare your connection to your ClearNode
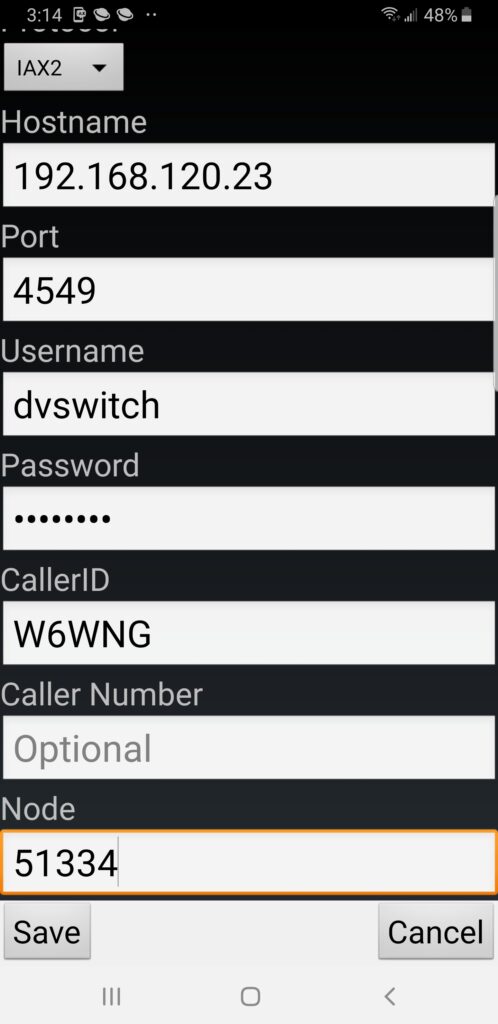
Fill in the entries as above – note that the “Username” MUST be “dvswitch”. Also note that IAX Port is a separate field in this application – be sure to get that correct. Password is the same as that set in your node’s “AllStar Setup > AllStar Identity > dvswitch/zoiper Password”, “CallerID” is up to you – the convention is to put your call sign there. “Node” will be the node number of the ClearNode you want to connect to.
With that complete navigate back to the “Dialer” screen which should look something like the following.
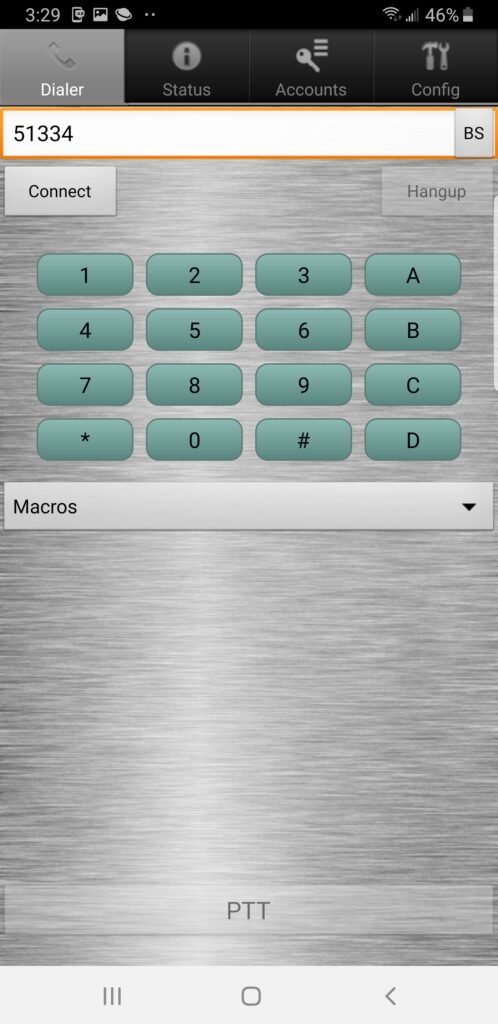
Now you’re ready to start the connection – tap “Connect” and wait for the connection to complete. If all is well your Dialer screen should look something like the following.
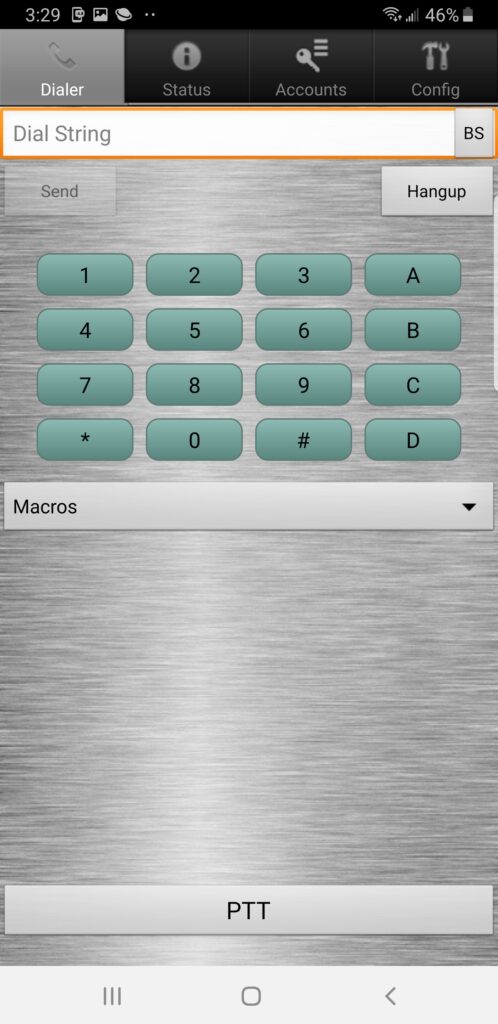
If instead of “Connect” and “Hangup” buttons you get a “Register” button, tap on that first to get the account registered with your ClearNode – if that fails, there is something wrong with your account configuration.
Be aware that the PTT button toggles your transmission on or off – it’s not a momentary switch – it’s either on or it’s off. If you accidentally turn on PTT and lock up any other system your ClearNode is connected to – you will make yourself very, very unpopular 🙂 You can change the behavior of the PTT button, so that it becomes momentary by changing “Toggle PTT Mode” in the “Config” tab.
Configuring RepeaterPhone
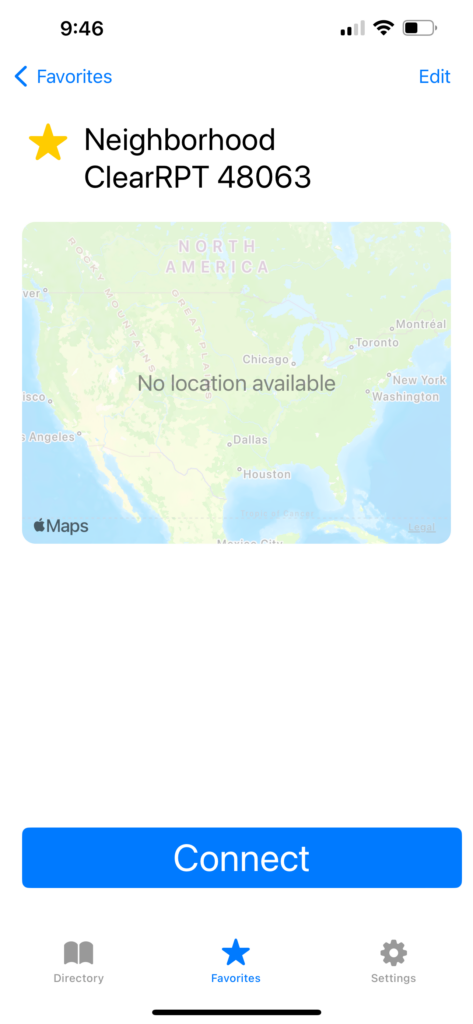
Go to the “Favorites” tab and create a new entry for the ClearNode you want to connect to.
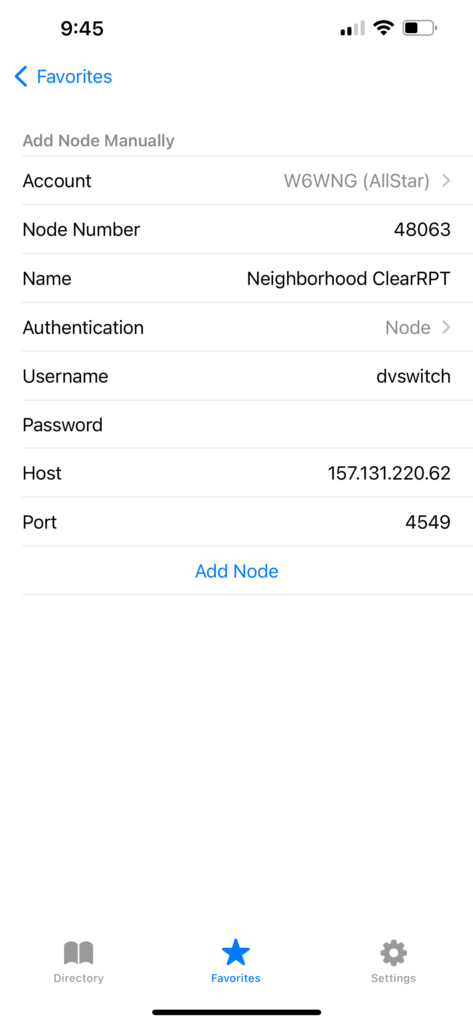
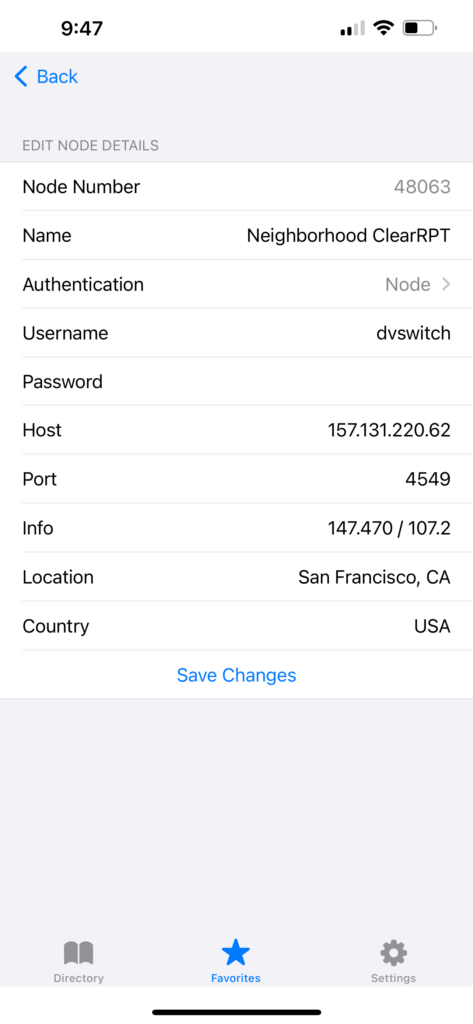
Use “Authentication – Node” in favor of Account. Your ClearNode is already configured with user “dvswitch” – use that as your username. The Password you should have already entered in your ClearNode mobile app – Node Details > AllStar Setup > AllStar Identity
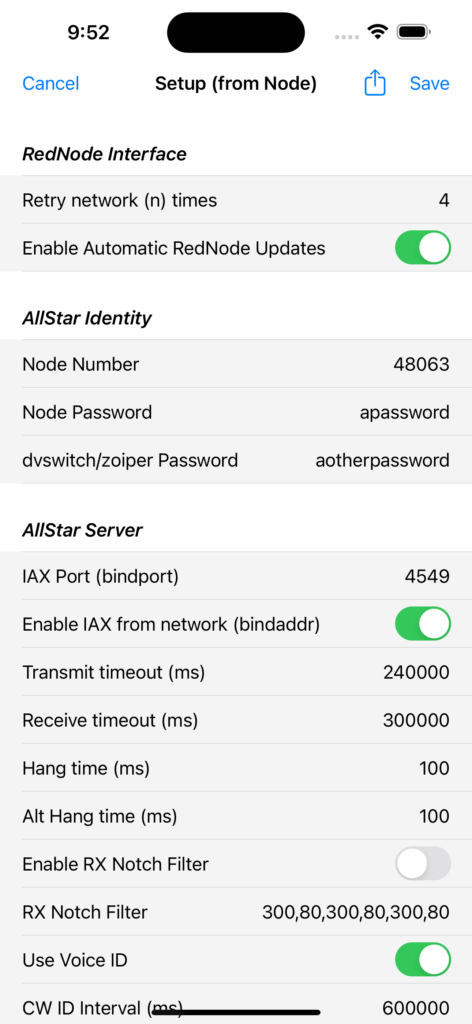
The “Host” will be either your public WAN IP Address, if you are connecting while you are away from home, or, the LAN IP Address, if you are connecting from the same network that your ClearNode is connected to. (See the last paragraphs on this page for more info.) Be sure to enter the correct Port for your node – it is generally 4569, but you may have configured it differently in Node Details > AllStar Setup > AllStar Server > IAX Port (bindport). Save the configuration. If you want to add location information you can go back into the entry to add it by tapping on Edit in the top right corner.
Using Zoiper and DVSwitch from another network
The above configurations assume your mobile device is on the same network as your ClearNode – hence the private IP addresses presented. If you want to use these apps when you are truly mobile and your ClearNode is at home or in the office you have to configure the account a little differently – instead of the LAN IP Address for your node you would use the “WAN IP Address” which you can discover from your ClearNode mobile app – “Node Details” screen > Node123456 section > “WAN IP Address”.
However this assumes that you have setup the AllStar UDP Port Forwarding rule in your home WiFi/Router for your ClearNode’s IAX Port so the inbound connection can reach your ClearNode. Setting up Port Forwarding is beyond the scope of these instructions – consult your WiFi/Router’s documentation.