Please note that we are not providing Customer Support for DSTAR. Enjoy playing with it, and kudos if you get it to work 🙂
Introduction
As of API Release 101 and ClearNode Mobile App release 1.40, we are beginning a limited release of DVSwitch support for DSTAR for ClearNode devices. DSTAR will NOT function on the ClearZero or ClearAlpha devices since they have no available USB port for the hardware vocoder.
Using DSTAR on ClearNode requires a hardware voice encoder – connections cannot be made without one. The software encoder/emulator does not produce acceptable audio for DSTAR.
Hardware issues
We have observed FTDI buffer overruns in the logs that lead to the dongle being disconnected. The upshot is that DVSwitch Analog_Bridge does not find, or loses connection to the DV3000 hardware vocoder in certain conditions. A hardware vocoder is required for Analog_Bridge and ircddbgateway to produce usable audio encoding for DSTAR. Therefore, if the ClearNode software does not detect a functional hardware vocoder it will not allow connections to the DSTAR system.
Please note that we are NOT criticizing the DV3000 dongle manufacturers, nor Raspberry Pi Ltd, nor the authors of the DVSwitch software – likely this is an issue that none have foreseen nor been able to resolve as of yet.
DSTAR Initialization
There are complications with ircddbgateway connecting with the DSTAR system during startup, we have observed several network operation stalls eventually leading to network timeouts before the initialization process completes. This is not a failure per-se, more an inconvenient delay. It can take several minutes before ircddbgateway is usable.
Limited Release and Support
By Limited Release we mean that, by default, DSTAR will NOT be enabled in the Digital Bridge Setup – it will be enabled on a case by case basis if you contact us and request that DSTAR be enabled. We’re taking this approach so we can be quite sure that we communicate, and the end user understands the limitations, but none-the-less, wants to experiment.
In particular we want folks to understand that we will NOT be providing Technical Support for DSTAR operations beyond the notes and suggestions on this page.
And now the workaround …
Firstly, get in touch and request DSTAR to be enabled.
DO NOT insert your DV3000 dongle in the USB port of your ClearNode just yet – start with it disconnected. Assuming you have been in touch with Support and we have enabled DSTAR on your node, tap through to the Digital Bridge Setup and switch modes to DSTAR.
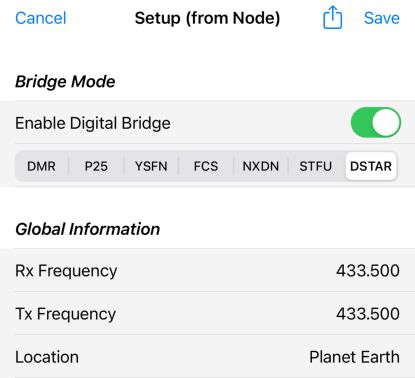
Tap Save and wait for your node to reboot. After reboot – WAIT ! Wait at least 5 minutes to ensure that the DSTAR initialization process has completed – it will do so using the audio encoder software emulator. Since there’s no connection and no audio being sent yet – you’re not sending unintelligible audio to the DSTAR system – we want to avoid this at all costs so we don’t get banned from the Reflectors.
Now go in to Node Details > ADD CONNECTION and select the “Digital” tab – you should immediately get the following warning.
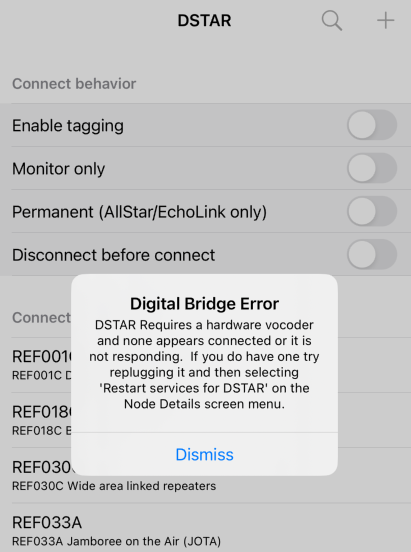
Once you select Dismiss, you will be returned to the Node Details screen. This test was just to make sure that the DSTAR mode started and the node understands that there is no vocoder connected. If you don’t get this message, power off the node go back to the beginning of these instructions.
Connecting the DV3000 Dongle
We are ready now to connect the DV3000 dongle. Keep your node powered up – do not restart it.
You must insert the dongle in the correct USB port, which depends on which version of ClearNode you have, failure to use the correct port will likely disable your ClearNode until you remove it and restart your node.
If you have the Raspberry Pi 3B based ClearNode – it has the full width Radio “Hat” PCB with RedNode revision up to V2.2 – insert it in either of the outside USB ports – do NOT use the ports in the center of the node.
If you have the Raspberry Pi 4B based ClearNode – it has the fan, the half width Radio “Hat” PCB with RedNode revision V3.0 or above – insert it in either of the blue center USB ports – do NOT use the ports on the outside of the node.
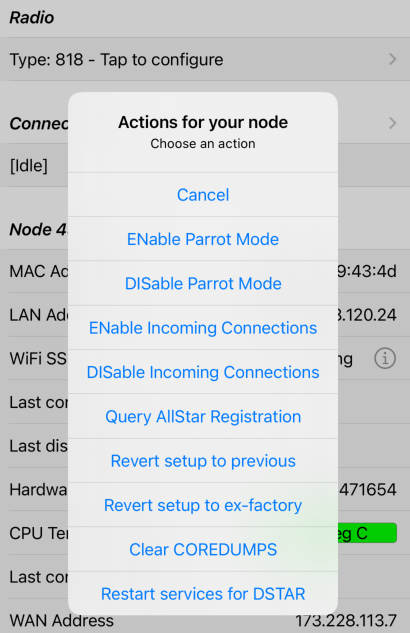
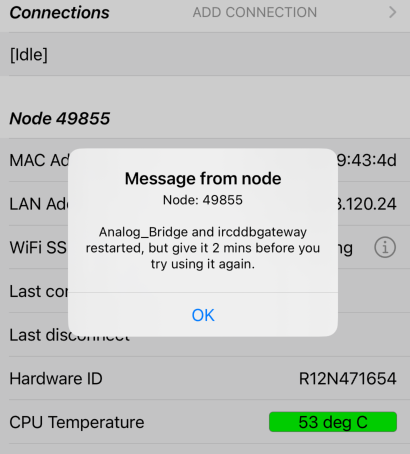
Now it’s time to try and get Analog_Bridge to connect to the dongle. On the Node Details screen for the node, activate the screen menu and select the option “Restart services for DSTAR”. (If you don’t see this option on the menu – DSTAR has not been enabled by Support, or you are not in DSTAR mode in Digital Bridge Configuration, or the Digital Bridge is not enabled.)
After about 5 seconds you should get a confirmation that the restart was requested. This does not confirm, yet, that the vocoder was found and connected to.
Tap OK as quickly as you can – we’re looking to get another confirmation that the vocoder was found – if you don’t clear this dialog quickly you’ll miss it (sorry about that, it’s an Apple thing).
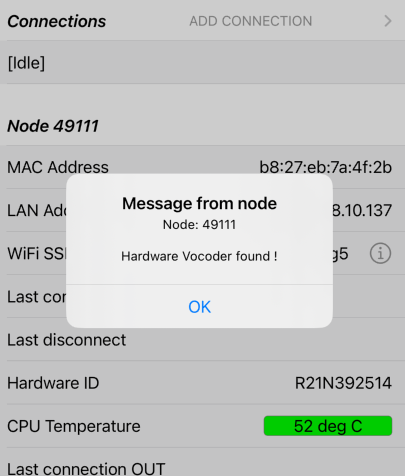
(Ignore the different node number in the above image sequence – we had technical difficulties during the preparation of these notes – let’s pretend.)
If you don’t get this confirmation then the go back to the heading “Connecting the DV3000 Dongle” – remove the dongle and re-insert it the alternate USB outlet in the same vertical bank. Try the “Restart services for DSTAR” again as above.
Connecting to DSTAR Reflectors
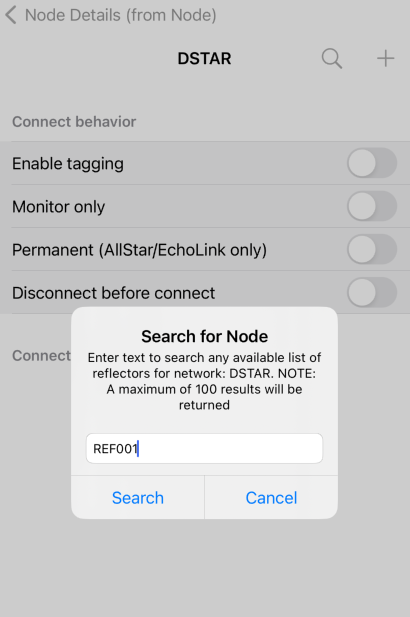
You can now return to the Node Details > ADD CONNECTION screen. If this is the first time you’ve used DSTAR your history list will be blank – use the search function by tapping on the Search icon in the top right corner.
You should get results similar to below – go ahead and tap on your choice !
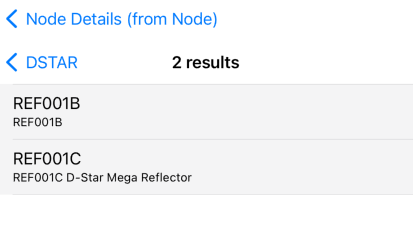
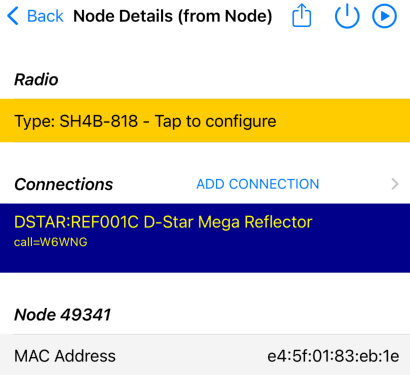
This will return you to the Node Details screen and the node will attempt to connect.
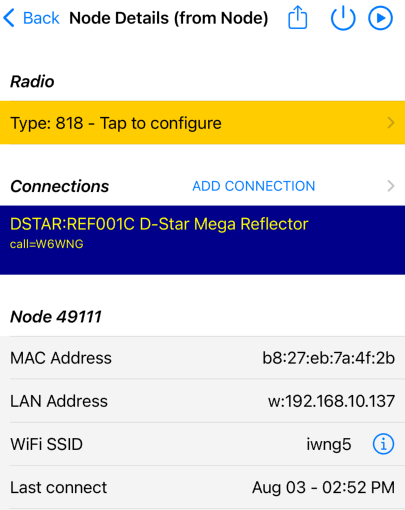
You should see something similar to above with your node announcing the connection over your HT. If you don’t get the announcement, or the announcement says “Not connected”, or you are missing the small print above “call=[some call sign]” – likely ircddbgateway has failed for this connection or has failed completely – go back to Node Details and retry the “Restart services for DSTAR” menu option.
If at any point you get this popup:
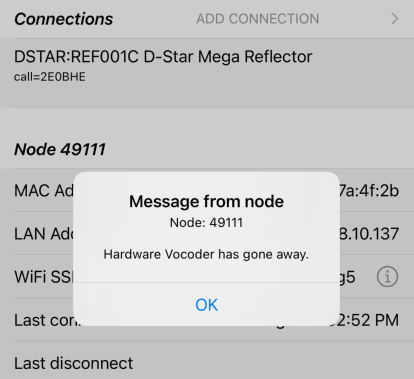
As the popup says, the connection to the hardware vocoder has failed and you will need to try the entire process over again.
Have fun !