Monthly archives: June, 2023

Did you know ? … Episode 6

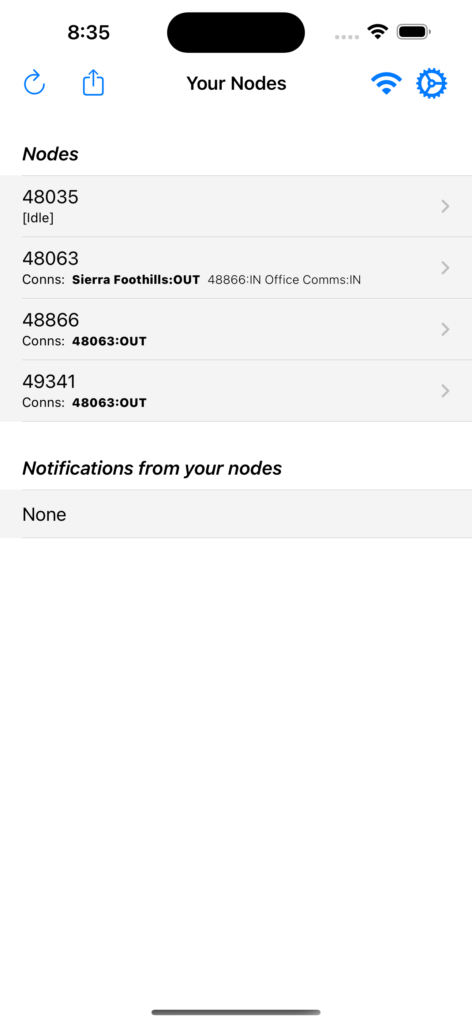
How configuration works on ClearNode

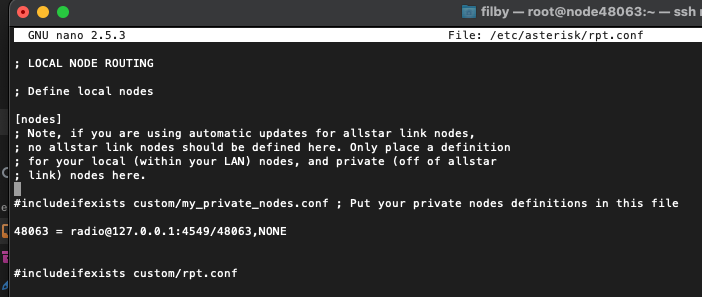
AllStar, EchoLink and the Digital Modes are software packages written by some very capable software engineers in the AllStar, EchoLink and DVSwitch communities. We at ClearNode are “standing on the shoulders of giants” – the ClearNode system is a software layer that integrates those other systems. All these software services have one thing in common – they use configuration files to know who/what they are and how they should behave. In general those configuration files are plain text files that have a very specific layout and have file extensions (the last part of the file name after the period) like “conf” or “ini”. Once in a while a configuration file has no period and no extension e.g. “/etc/hostname”.

For those folks who don’t benefit from the ClearNode system layer on their nodes – they have to edit those files directly at the Linux command line using an editor like “vi” or “nano”. As I said – those files have a very specific layout and the editing process is very unforgiving – a character in the wrong place and your node is a “lump on a stump”, until you spot the error in the file.

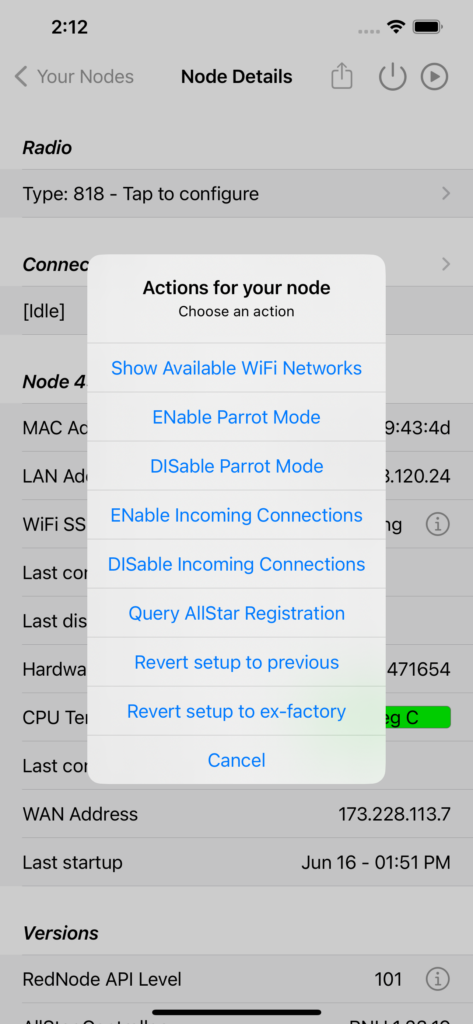
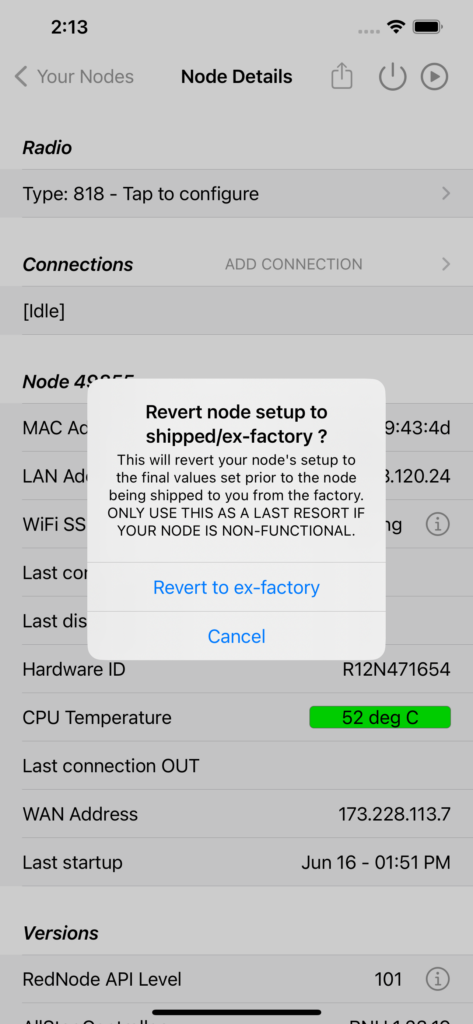
ClearNode generates all those files for you by reading in template files and then performing text replacement with the configuration values you enter in the ClearNode mobile app. ClearNode also stores ALL those configuration values in a master file on the node. We keep historical versions of that master file that allows you to do things like “Revert setup to previous” and “Revert setup to ex-factory” … etc.

ClearNode also keeps a copy of each node’s configuration in the data space in the ClearNode mobile app on your phone or tablet. And … if you’ve enabled “Auto Backup Node Config” … your mobile app will send a copy of the current configuration to the Node-Ventures servers for safety. So, if your node SD Card fails and you have to start from scratch – you have a couple of safety copies to work with.

Don’t edit the configuration files directly

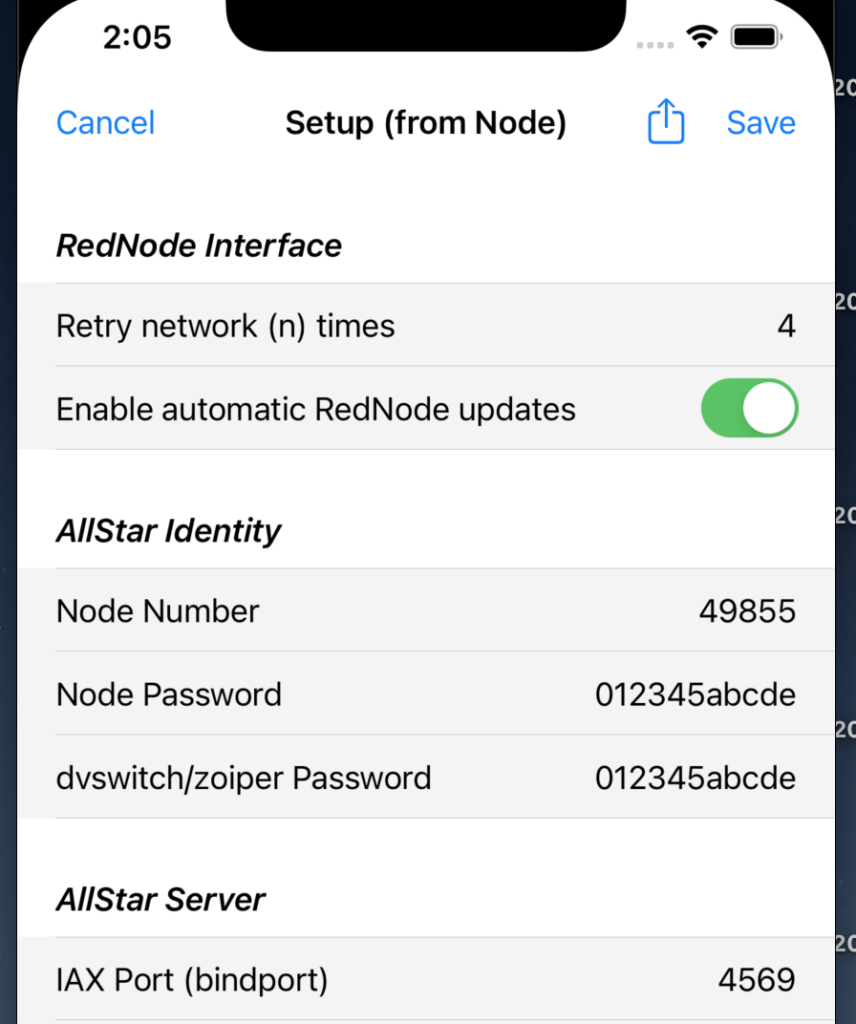
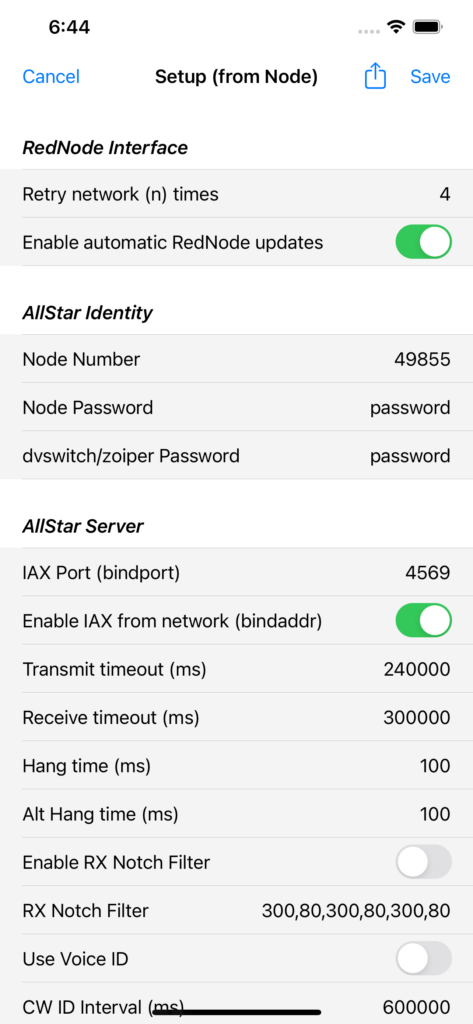
When you open your ClearNode mobile app and navigate to one of the setup screens – the app asks the node to send over it’s current configuration – it DOES NOT read individual configuration files – it reads the master configuration file and sends that over to your mobile app. After you open the configuration screen there is a request to, and response from your node – and then the screen displays the current information. Take a look at the title of the configuration screen – sometimes you can spot the title changing from “Setup (from default/preference)” to “Setup (from Node”) – that’s how you know that the request/response has completed and you are looking at the latest values from the node.

If you have edited the “ini” and “conf” files directly the screen above will NOT reflect the values you edited – it will display the last values you saved via the mobile app above, and when you Save the values to the node your previous direct edits will be overwritten.

You can, of course, chose to ignore the ClearNode mobile app and do the editing yourself at the command line – but just be aware – it’s a binary choice – do one or the other – but not both.

Advanced users: if there’s a particular value in one of the native configuration files that you don’t see exposed in the ClearNode mobile app setup screens – please get in touch – chances are we’ll add it in with the next software release.

Darn my SD Card failed – now what ?

Fear not – we can either send you a replacement, pre-configured with the last values you saved on our servers, or we can have you download a factory image and burn it to a new SD Card. Once that’s done we’ll complete the setup remotely over the network.

But what if you never saved your node’s configuration to our servers ? Again … fear not … it’s likely you have a copy of that configuration in your mobile phone, because every time you Save the configuration to your node, it’s also stored in the mobile app just in case.

Here’s a typical scenario – your SD Card failed – you downloaded the factory image, burned it to an SD Card, powered up the node and we have completed our initial prep – you have a functioning node again. But look it’s got no configuration !

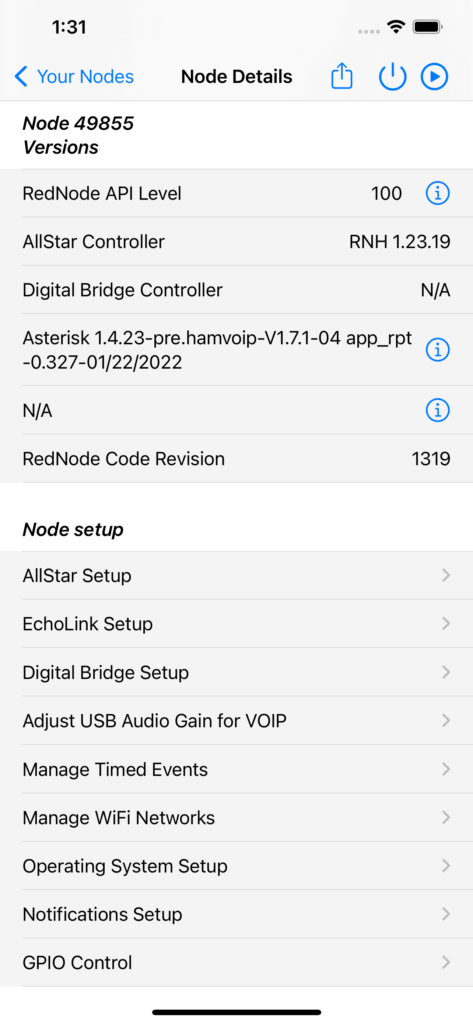
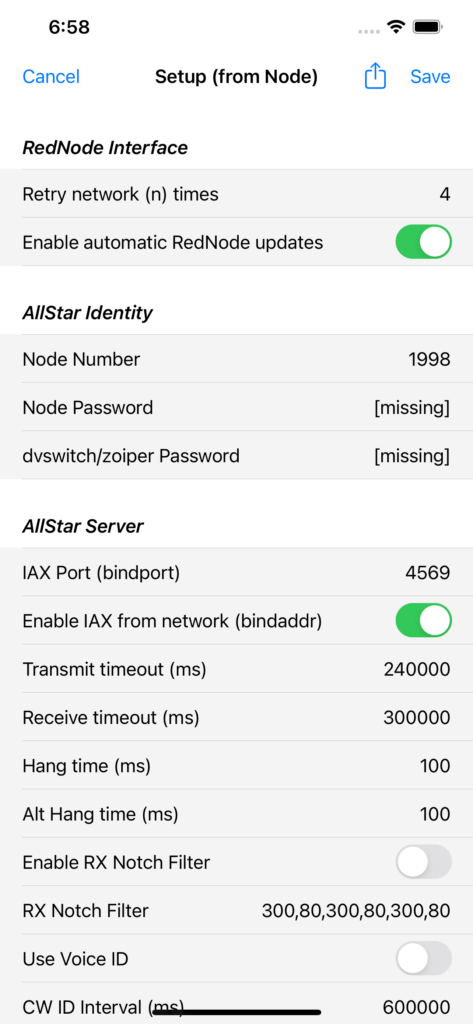
Click on your node, and then from Node Details screen, select “AllStar Setup” – you get the default factory values, which are pretty much useless to you.

Go ahead and enter your node # and accept/return – you will get a popup offering you the node setup previously saved into the ClearNode mobile app.

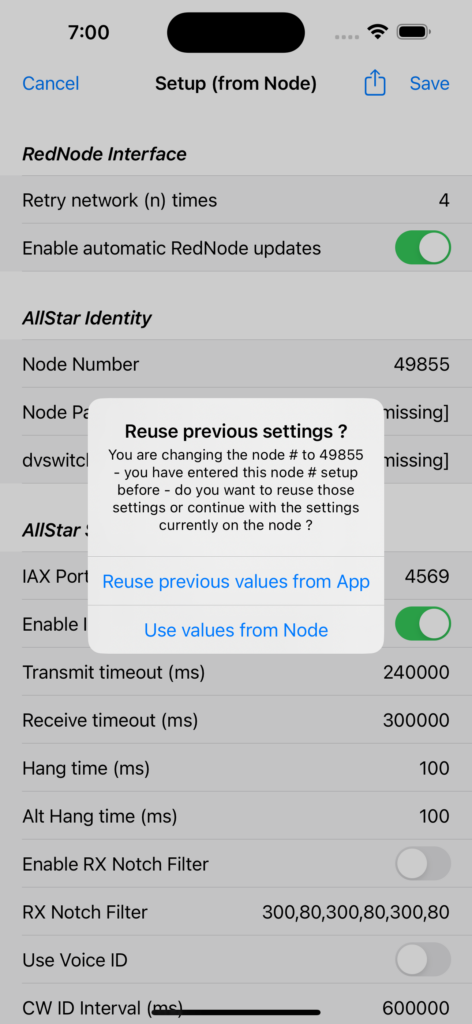
Go ahead and accept “Reuse previous values from App” – and bingo – you’ve got your old settings back !

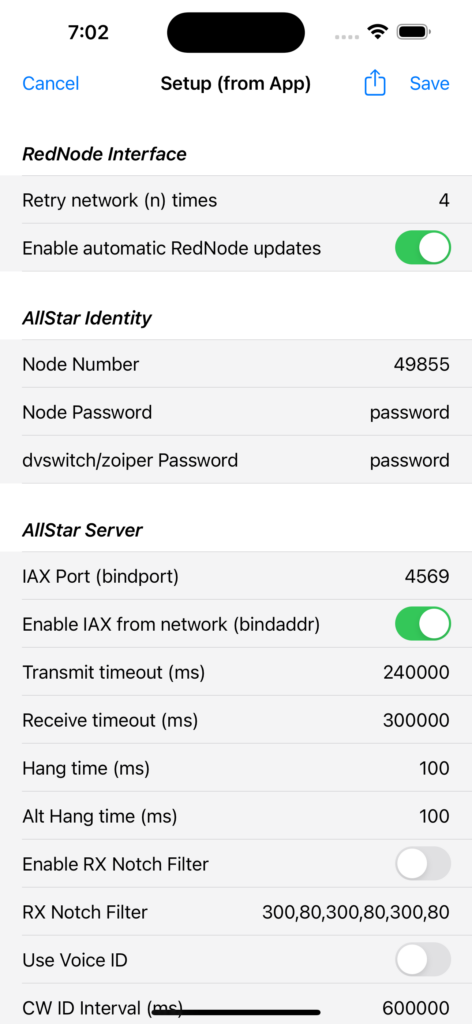
Save those values to the node (“Save” top right corner) and wait for your node to reboot. You are back in business ! You can also click on the Share menu and choose “Restore/Download Node Setup” – if you had previously backed up your configuration to our server, it will be retrieved so you can reuse it.

73 … Gerry.

(This is the sixth episode in a series of posts to help you discover all the functionality that you might not know exists in your ClearNode, ClearAlpha, ClearZero or ClearRPT. We’re going to publish an episode each Sunday evening – come back and join us each week !)


ClearRPT V2 is now available !

Based on the Raspberry Pi 4B, ClearRPT V2 supports Hi and Lo Polarity for COS and PTT, includes an integrated cooling fan. It is currently available in the web store.

We currently have configuration and cables to support the Alinco and Yaesu Land Mobile radios. Kenwood radios are under investigation.

73 … Gerry.


Did you know ? … Episode 5

Configuration all messed up ?

There are a LOT of configuration options in ClearNode, and as folks discover other settings they want to be able to control, we dutifully add them to the configuration screens. If you chose to have your ClearNode delivered with minimal or no configuration, apart from your call sign, you really only need to configure 2 items to get your node up and running on AllStar – Node Number and Node Password. (“IAX Port (binport)” is important to, but in general you leave it at the default.)

As time goes by you will start tweaking the myriad other options – and why not ? … customize your node to suite your purpose and use case. Until … oh phooey … now NOTHING works !!! … and I’ve only got half an hour before the net starts !!! … and I’m filling in for Net Control !!!

You have a “get out of jail free” card to play – “Revert setup to ex-factory” – on the Node Details screen, tap on the Share menu icon in the top right corner.

When we get ready to ship your node to you, we configure the settings you sent to us – usually AllStar, EchoLink, WiFi and Radio frequency/CTCSS, along with some other settings specific to your account. We then test each of these modes to make sure your node is ready to get to work for you. The very last thing we do before shutting down your new node and packing it ready for shipping – we run a “Cleanup” script that makes sure any extraneous files are removed and then we generate a special file that reflects your node settings at that point in time: “nodeSetup.shipped”. That file will not change again unless Support re-runs the Cleanup script, which we rarely do.

Choosing this option will reset your nodes configuration to that known good configuration – which, in general, will get you out of your conundrum.

73 … Gerry.

(This is the fifth episode in a series of posts to help you discover all the functionality that you might not know exists in your ClearNode, ClearAlpha, ClearZero or ClearRPT. We’re going to publish an episode each Sunday evening – come back and join us each week !)


Did you know ? … Episode 4

ClearNode automates Private Nodes

There are a surprising number of ClearNode customers who own multiple ClearNodes, ClearRPTs, ClearZeros and ClearAlphas. Often times those nodes co-exist on the same home or office network.

In general, nodes “find” each other by looking up the destination node in a reference database that each node downloads every so many minutes. That database links the node’s AllStar # with it’s public Wide Area Network (WAN) IP Address and the IAX Port it is using. When your local node goes to connect to another node it uses that information to start the connection to the destination node.

Now imagine you want to connect 2 nodes together that are on the same home network – they both have the same WAN IP Address – the process above is not going to work. (There are some tricks you can deploy in advanced routers like “pfsense”, but those are beyond the scope of this discussion.) It’s somewhat analogous to wanting to pass a letter to your family member in the same house – you wouldn’t take it to your local Post Office and have them deliver it.

AllStar provides a mechanism in its core configuration file “rpt.conf” to overcome this limitation – there is a stanza “[nodes]” at the end of the file where you can define local “pointers” to your local nodes that AllStar will not be able to resolve via the public node database that is periodically downloaded. Here is an example of such a stanza that is empty – i.e. it only refers to itself.

Pretty scary looking huh ?

The ClearNode mobile app can automate the generation of this information – since it knows the intimate details of your nodes – including what network they are on and what their individual local IP addresses are.

From the “Your Nodes” screen of the ClearNode mobile app, tap the “Share” menu in the top right corner and chose “Configure Private Nodes”.

This process happens pretty quickly, but it will reboot every node that it updates. Below is an example output file for Node 48063 that tells AllStar where it can find the other local nodes. In my case I have 2 locations each with their own WAN IP Addresses, so it only links the ones that local to each location.

And hey presto ! Now I can connect my 2 test nodes to my main neighborhood Simplex node.

Of course, this only works for your ClearNodes – if you have other nodes that are not connected to the ClearNode control system they won’t be included. Another good reason for getting a ClearNode software subscription for your SHARI and DINAH devices !

73 … Gerry.

(This is the fourth episode in a series of posts to help you discover all the functionality that you might not know exists in your ClearNode, ClearAlpha, ClearZero or ClearRPT. We’re going to publish an episode each Sunday evening – come back and join us each week !)


Did you know ? … Episode 3

(This is the third episode in a series of posts to help you discover all the functionality that you might not know exists in your ClearNode, ClearAlpha, ClearZero or ClearRPT. We’re going to publish an episode each Sunday evening – come back and join us each week !)

Timed Events – special cases

Just a quick recap – Timed Events are control actions that your node can take automatically at specific times of the Month, Week, Day or Hour.

Select “Manage Timed Events” on the bottom of the Node Details screen

You can specify things like “Connect to DoDropIn every Tuesday at 7 pm” (for The Absolute Tech Net)

That’s pretty straight forward, in the time picker you are picking a specific day of the week, hour and minute, and of course the node you want to connect to.

Imagine you generally keep your node connected to a particular hub all day every day – with their permission of course. But the hub controllers have to reboot that hub once in a while, or maybe when you’re not in attendance some miscreant uses your node interfere with the hub, and the hub controllers have to disconnect your node to put a stop to it. Now when you come back to your node you see it disconnected – has been for hours – that’s a tad annoying. There is a solution – again get permission before from the hub controllers before you deploy this.

You can have your node re-connect every so many minutes per hour – the miscreants usually lose interest if they’ve been intercepted and disconnected, you can get back to business once they’ve gone elsewhere.

Create a Connect type Timed Event and select “Hourly” for the Repeat type. Now scroll the Minute Picker down to the bottom – note there are several odd looking entries with a star, a slash and a number.

The number represents how many minutes between each connect attempt, starting at the top of the hour. So “*/20” means the connection will be attempted at 0, 20 and 40 minutes past the top of the hour. I’m sure you can figure out the other alternates for yourself. Handy way to refresh that connection if get’s dropped. In this case the longest you’ll be disconnected will be 20 minutes. If it’s already connected, the connect attempt will be ignored.

After a reboot

There may be an action you want performed shortly after the node boots up – every time it boots up. There is a special case for the “Repeat” type. Create a new Timed Event and scroll the “Repeat” all the way to the bottom.

Note that the “Event time” picker has been locked out and now says “After reboot”. You can pick any Event Type for this kind of “After reboot” entry, although some probably won’t be appropriate – Custom Shell Commands are going to be particularly useful for some of you Linux savvy folks.

These “After reboot” events don’t fire immediately after reboot – they are delayed by 30 seconds – that’s so you can be sure the node has completed it’s startup process, so you’re command isn’t calling some service that hasn’t started up yet.

FYI … in ClearNode Timed Events are implemented as “cron jobs” – you can list them at the Linux CLI using the command “crontab -l”. We constructed this “separation of concerns” so that in the future, if we implement ClearNode on a platform other than Linux that doesn’t support “crontab”, we’d have the option to create something that has a familiar look and feel.

And one last time … if you implement automated connections to big hubs – be careful not to cross connect and ALWAYS seek permission before you do so.

73 … Gerry.